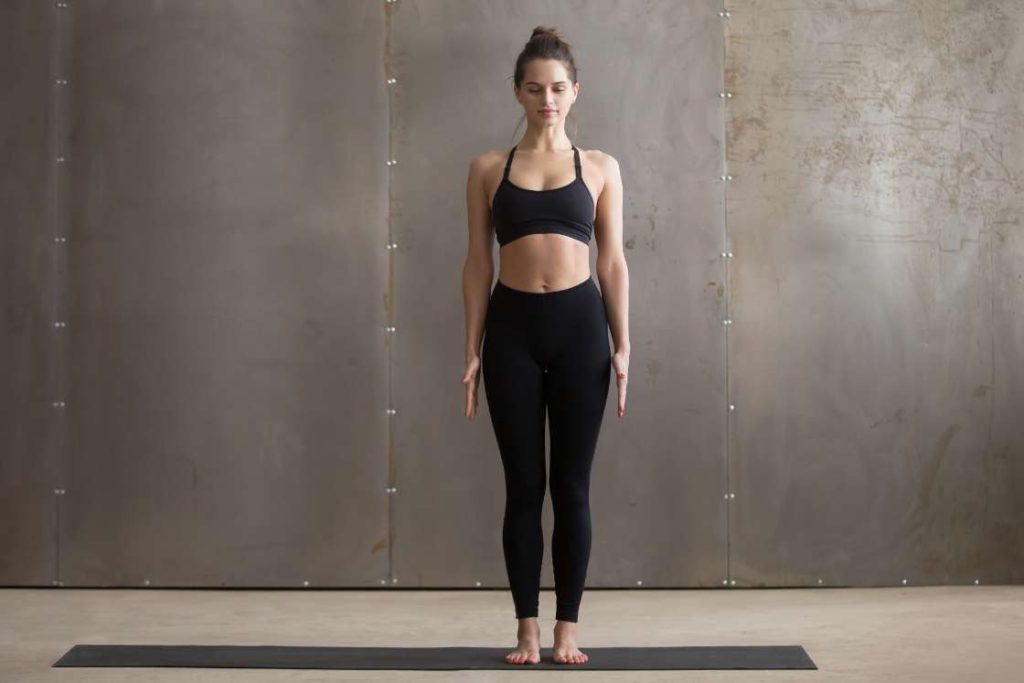
Mountain pose is a simple standing posture that requires the feet to be together and the body to be stable and upright while standing straight.
The name is composed of the Sanskrit words “tada,” meaning “mountain,” and “asana,” meaning “pose.” It is a powerful posture that promotes balance, concentration, calmness and good posture.
On a deeper level, it helps maintain awareness of alignment while exploring the body in solitude.
And you are not just standing there by accident.
Your entire body plays a role in aligning your bones and maintaining an upright spine, and you need to be aware of each element.
Also, in this posture, the harmony of the seven chakras is established with the help of the energizing and calming flow of prana.
When you consciously practice the mountain posture, you can realize and internalize the strength and stability of a mountain.
The teachers of the Ashtanga lineage also refer to it as samasthiti, where “sama” means “equal” and “sthiti” means “standing still“
In yoga, it serves as a precursor to all other standing postures and can also be performed independently. It is considered the most basic yoga posture. All other yoga postures can be practiced more effectively if this asana is mastered.
If you know the correct proportions of Mountain Pose, you can perform all other standing postures and inversions more quickly and easily and maintain alignment.
Mountain Pose(Tadasana) Practice Guide
How to Do Mountain Pose(Steps)
- Stand on a yoga mat with bare feet. You can either keep your feet together or hip-width apart.
- Lift the toes, spread the toe fingers apart and place them to distribute the weight evenly.
- Make sure your pelvis is forward in a neutral position and your knees and hips are aligned.
- Squeeze your thighs together, rotate them inward and pull your kneecaps up.
- Maintain the natural curvature of the spine.
- Pull the sternum up without pushing out the lower ribs.
- Make your collarbones wider and make sure your shoulders are over your pelvis.
- Bring your shoulders to your ears and pull your shoulders back to release your shoulder blades downward.
- Stretch the crown of your head toward the ceiling to keep your head straight and in line with your spine.
- Hold the arms at the sides, palms facing forward or inward, and spread the fingers.
- Remain in this posture for 5-10 breaths.
Beginners’ Tips
- Despite the fact that Tadasana appears to be just standing up, try not to rush through it or bypass it. At the beginning of any yoga practice, perform at least one perfect mountain pose with complete awareness.
- You can keep your feet slightly apart instead of closing them together to avoid the ankles rubbing against each other.
- It is often recommended to place the legs hip-width apart as it aids with finding your balance and stability.
- To feel the rotation of the thighs, place a yoga block between your thighs and squeeze it. The widest surface of the block should be placed on the inside of your thighs.
- Practice the pose in front of a mirror to verify your alignment.
- A folded blanket can be kept under the heels to reduce any discomfort. If a blanket is not available, you can fold one end of the mat.
Mountain Pose Variations
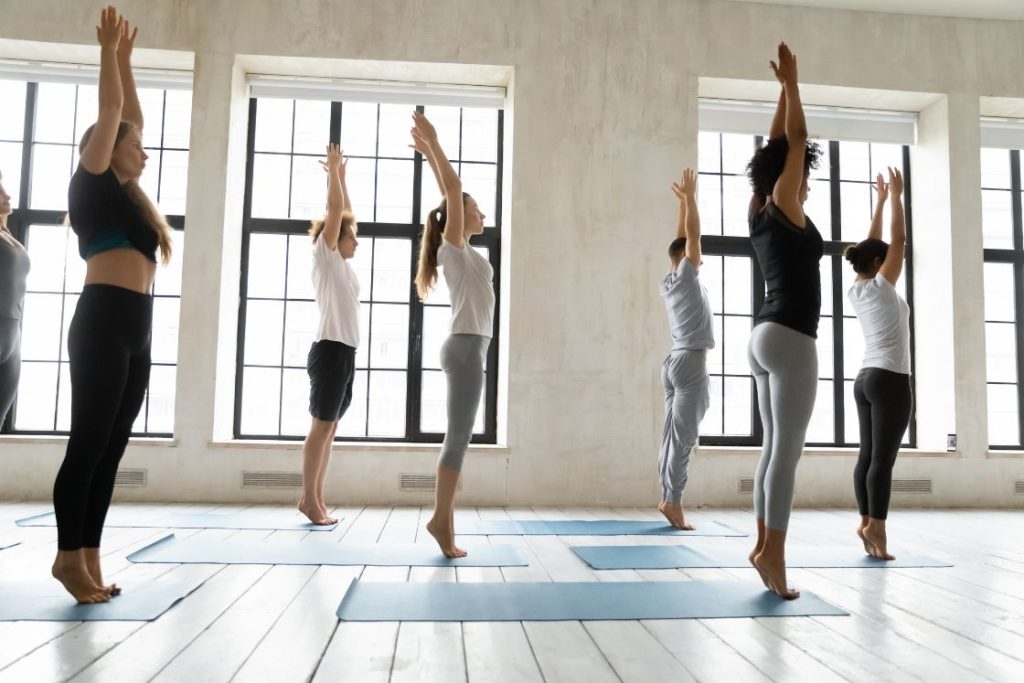
- Extended Tadasana (Palm Tree Pose): This variation increases overall body flexibility and is particularly beneficial for height increase. Stand in Tadasana, raise your hands above the head, interlock the fingers, and stretch upwards while lifting your heels. Repeat the process, releasing with each exhalation.

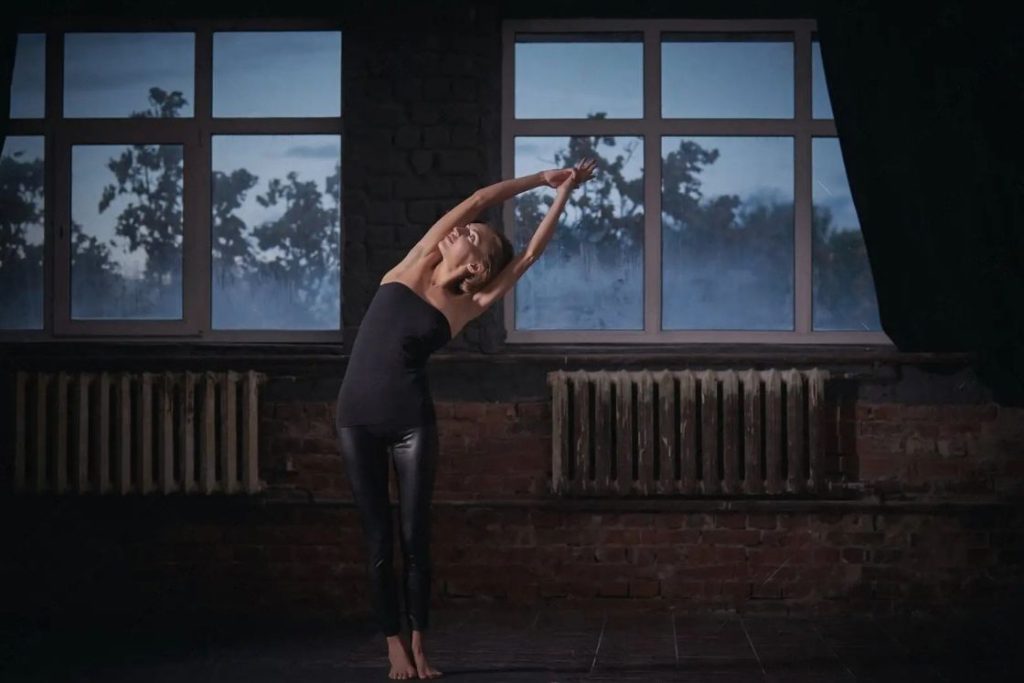
Tiryaka Tadasana: This variation provides a good stretch to the waist and sides of the body. Start in Palm Tree Pose and then, with inhalation, bend your upper body towards the right from the waist. Exhale and release. Repeat the same on the left side.
These variations offer unique stretches and benefits, allowing practitioners to explore different dimensions of the Tadasana pose.

Modifications
- Some of the most common modifications for the mountain pose are in the form of arm placements, such as:
- Stretching your arms overhead and keeping them straight. In this position, the hands can be joined together in Anjali Mudra or the fingers of both hands can be interlaced.
- Form the Anjali mudra with your hands in front of the chest.
- Form the Anjali mudra with your hands but with your hands at the back. This is called Reverse Anjali mudra or reverse namaste. This might be slightly difficult for people who have tight shoulders and stiff upper back.
- To get a straight back and spine, you can take the support of a wall by keeping your back against it.
- The use of a yoga block between the wall and various parts of your back will help in keeping your chest and hips aligned:
- Place a yoga block between the upper or middle back to prevent falling of the chest.
- Place a yoga block between the lower back to prevent falling of the hips and lower back.
Contraindication
- People suffering from vertigo, migraine, low or high blood pressure, or headache should proceed with caution as this pose requires some level of balance. The same applies to pregnant women and senior citizens.
- If you have recently undergone surgery or suffered an injury in your back, knees, ankles, or hip, you should avoid this pose for the time being.
Follow-up Poses
Any standing, balancing, inversion, or forward poses can be a follow-up from the mountain pose. Some popular follow-up poses are:
- Tree Pose (Vrksasana)
- Eagle Pose (Garudasana)
- Standing Forward Bend (Uttanasana)
- Five Pointed Star (Utthita Tadasana)
- Upward Salute (Urdhva Hastasana)
Benefits of Mountain Pose(Tadasana)
Mountain pose is the mother of all poses as it benefits each and every part of your body. Standing straight with a perfect alignment encourages better breathing, improves posture, tones muscles, and free flow of energy throughout the body. It is also a good way to increase your concentration and awareness.
Here are some of the benefits of practicing the mountain pose:
- Improves posture and balance. By standing up straight, you are essentially straightening your spine, pelvis, back and head so that they come into their natural formation. Practicing mountain pose counteracts a rounded back and stiff pelvic area that result from sitting for long periods of time. By addressing these areas, you aim for good posture and keep your body balanced.
- Tones your leg, abdominal and gluteal muscles. You’ll work your abdominal muscles to support the natural curve of your lower back. The glutes help maintain a neutral pelvic position. And to stand firmly on the ground, every muscle in your leg is thoroughly engaged.
- This strengthens your thighs, knees and ankles. You actively tighten your thigh muscles as you pull your knees up. Your ankles also need to exert some pressure to keep your legs straight and support your body weight. All of this helps to strengthen these regions.
- Allows uninterrupted flow of energy through the spine. The prana flow is encouraged to flow through the spine freely as this pose enables you to stand straight. You need to maintain the alignment of the spinal column by stacking the vertebrae on top of each other and bringing awareness to it.
- Enhances awareness and alertness. The mountain pose encourages the practitioner to be conscious of all the subtle movements while maintaining the pose. Along with breath awareness, the practitioner becomes deeply aware of the stillness of this pose.
- Improve confidence and self-esteem. According to research published in 2017, yoga poses such as tadasana were effective in boosting self-esteem as compared to ‘power poses’ when performed for only 2 minutes. This is due to the expansive nature of such poses which expands the chests and encourages you to stand tall.
Conclusion
The mountain pose is the most accessible asana that anybody can perform. It stabilizes your mind and body and enhances your confidence and self-esteem. Even if you practice this pose for 2 minutes each day, you will find relief from mental fog and gain a calm mind.
Frequently Asked Questions
How long should you hold the mountain pose?
In the beginning, hold the mountain pose for 10-20 seconds at a time. Gradually increase this time and include this posture as a routine exercise at the beginning of your yoga asana sequence.
What are the disadvantages of mountain pose?
If you are a beginner, you should avoid standing for too long. As a beginner, your legs are not used to so much strain, and practicing for too long may tire out your legs sooner. Additionally, it may also strain your knee and cause pain. You should start small and include props like blankets or towels for your feet and gradually build up strength to hold the pose for longer durations.
Does mountain pose increase height?
While there is no substantial evidence to prove that the mountain pose can help in increasing height, it is believed that by stretching and lengthening all the major muscle groups, it is possible. It helps in the secretion of the growth hormone through the stimulation of the endocrine system and pituitary gland. Thus, if you consistently practice the mountain pose 5 times a day, you might be able to see some growth spurt.
However, secretion of the growth hormone is only possible till the age of 24.
Another possible explanation for an increased height is that since the mountain pose improves posture and enables an elongated spine, it makes you stand tall. This results in giving the impression of increased height.
The post Mountain Pose (Tadasana): How to Do, Benefits and Precautions appeared first on Fitsri.